I wanted to be able to control my AC units in the office and the bedroom, as well as my window blinds. They can be operated by infrared remote controllers. One of the main challenges I encountered while making this project was the that the Raspberry Pi module for LIRC, the IR control software was apparently designed for just 1 IR transmitter and 1 IR receiver at the time I did this project. This got in my way quite a bit but I was able to work around it. The IR transmitters I used transmit sideways and not straight up, and were flat, so that I could tape/glue it onto a surface of a device as unobtrusively as I could make it. I chose low power IR transmitters on purposes; they only use around 20ma which for an IR LED is not very much. There are simple ways to add more powerful IR LEDs using an extra resistor and transistor and power feed. In my case however, I put wires that I could hide above the ceiling and behind walls all the way to the AC units, and glue the IR transmitter LEDs facing inward onto the surface near the IR receiver eye of the AC units. The window blinds were fairly near the AC so I glued one facing outward towards the window blind's IR receiver eye. The distance is only like a meter so it works fine.
The device itself without cover
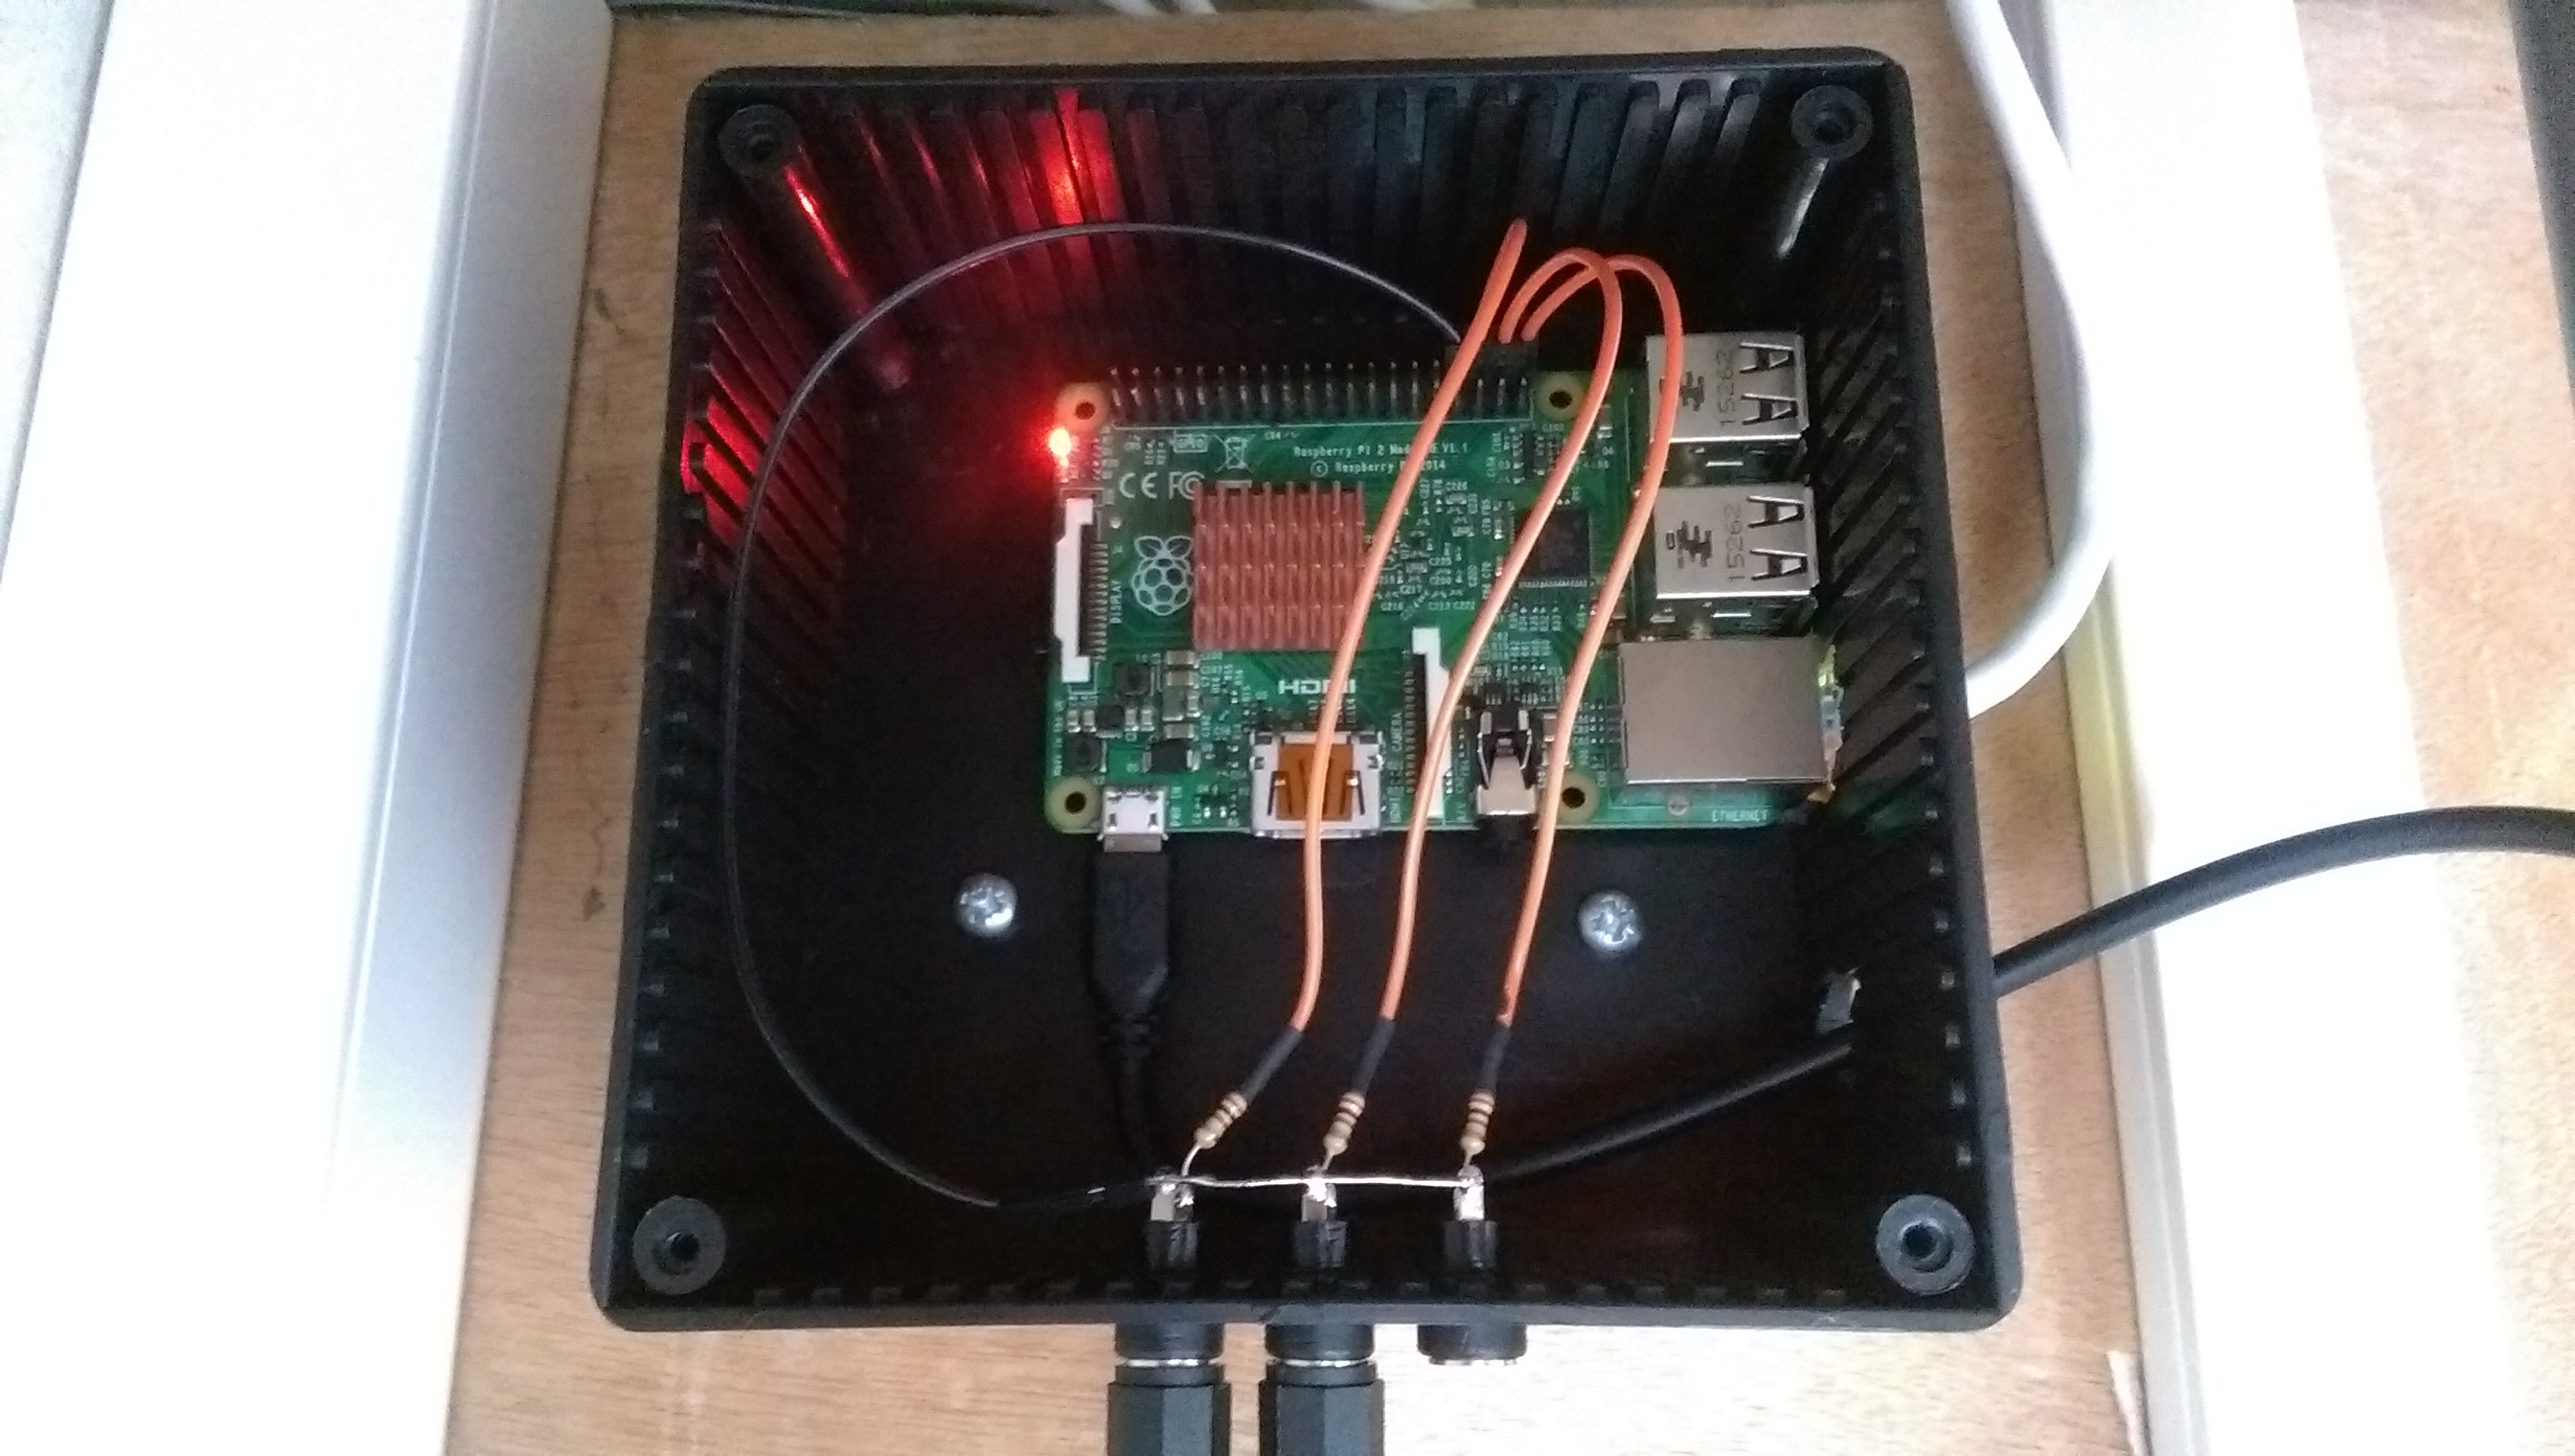
You can see 3 ports at the bottom where I put some plugs in so I can easily remove the IR transmitters just by unplugging them. In the picture I have only 2 of the 3 transmitters connected. The wiring includes 3 resistors of 200 ohm each to limit the current to about 20ma, which is what my IR LEDs could handle. A GPIO pin like on the Raspberry Pi 2 model B+ that is used here can output a max of about 50ma. So for higher power IR LEDs you'll need a few more components to get that working.
IR transmitter glued to AC unit

Online resources
I was obviously not the first to experiment with IR on a Raspberry Pi. I learned a lot from the pages I found here;
- http://alexba.in/blog/2013/03/09/raspberrypi-ir-schematic-for-lirc/
- http://mvartan.com/2014/11/25/controlling-your-tv-or-any-ir-device-with-raspberry-pi
- http://aron.ws/projects/lirc_rpi/ (now by default included in lirc for Raspberry Pi)
The LIRC multiple transmitter problem
In short, I didn't actually solve it. What I did was enable me to stop LIRC, unload the lirc_rpi driver, then reload it with new parameters (another GPIO pin), and start the LIRC service again and start blasting away the IR commands. It takes about 2 seconds to switch, and I don't intend to use the three IR transmitters I have at the same time, so this was fine by me.
Now the longer version. The main issue I encountered was that the lirc_rpi module apparently doesn't have a way to specify multiple incoming or outgoing GPIO pins. It takes only one pin. On top of that, with Raspbian Jessie and kernel 4.1, I was never able to unload and reload the module so I could switch 'on-the-fly' without a complete reboot. For some reason I couldn't use modprobe to unload and reload the module and specify a new GPIO port. I had to open /boot/config.txt and enable dt_overlay=lirc_rpi and specify the gpio_in_pin and gpio_out_pin parameters in there or it would just never work. The problem with this is that this only gets loaded during boot and there's no way to load it otherwise. So to switch pins I was forced to do a complete reboot, which was a bother.
I also found a project which was a few years old where someone had taken the code and improved upon it by making it possible to specify multiple pins. The project is here. Regrettably, I could never get it to work. The kernel module file on the site itself just didn't work with my system - must be wrong Raspberry Pi version or something - and the .c file I could never get to compile. And I tried a lot of things, but I don't have the .c coding genius to figure out this particular problem.
The solution
I went back to Raspbian release on the 5th of May of 2015, which was still based on Wheezy (Debian 7). Kernel 3.18.11 is in use on that version. As soon as I ran apt-get update and apt-get upgrade however, that kernel got upgraded to 4.1 which upset the module again. So I held back the package raspberrypi-bootlader to prevent the kernel from updating, but I did update all the other software, and installed LIRC:
sudo su
apt-mark hold raspberrypi-bootloader
apt-get update
apt-get upgrade
apt-get install lirc
But something still got in the way. I had to disable device_tree in /boot/config.txt by adding this line at the bottom and saving and rebooting:
device_tree=
With this done, I was now able to switch the input and output of LIRC at will by stopping the LIRC service, unloading the lirc_rpi module, and then reloading it with the new pin numbers, and then start and use the LIRC service. For example this script switches to input port 12 and output port 16. You'll note that I am suppressing all messages by redirecting to /dev/null and I also put in a 1 second 'sleep' wait command to ensure the driver is no longer in use before trying to unload it. Before I added that it would sometimes not unload.
service lirc stop >/dev/null 2>&1
sleep 1 >/dev/null 2>&1
modprobe -r lirc_rpi >/dev/null 2>&1
modprobe lirc_rpi gpio_in_pin=12 gpio_out_pin=16 >/dev/null 2>&1
service lirc start >/dev/null 2>&1
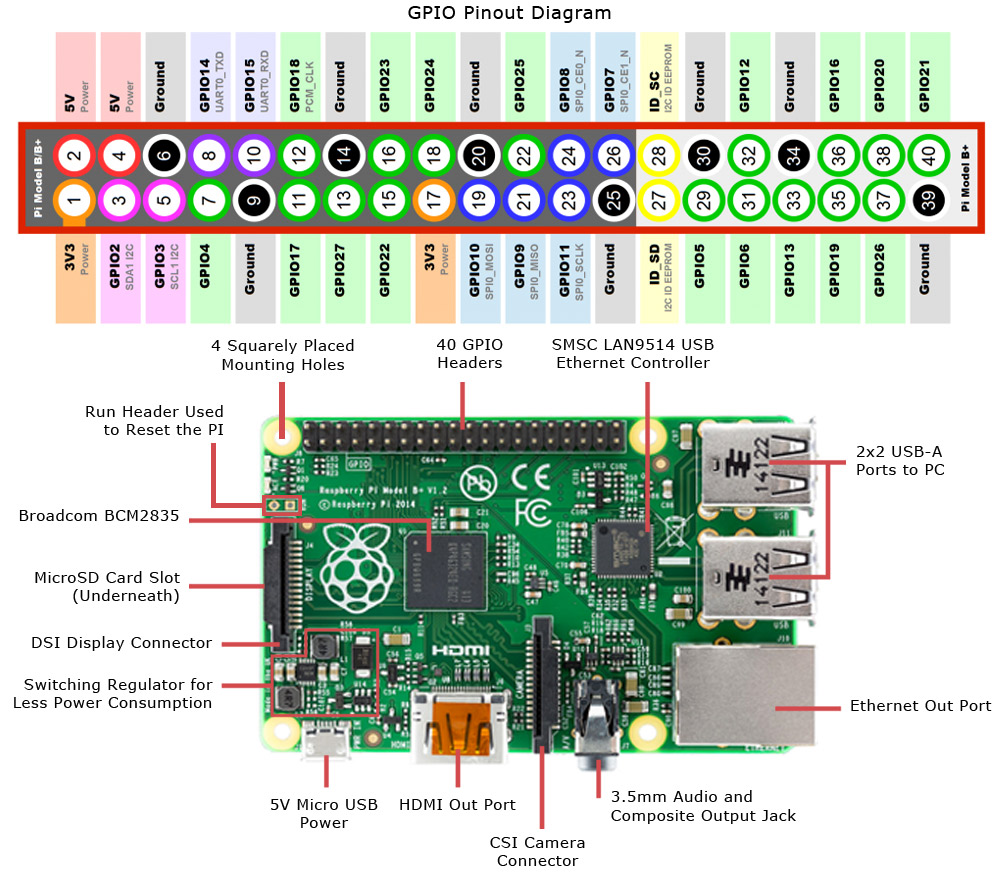
The above script I named ir1.sh and made executable with chmod +x. Now whenever I run it, my transmitter GPIO port is GPIO16. I have an ir2.sh and ir3.sh as well that have as gpio_out_pin the numbers 20 and 21. If you look at the GPIO overview of the Raspberry Pi 2 you can see that they're right next to eachother (pins 36, 38, and 40, with a ground on pin 34).
Show Raspberry Pi 2 GPIO ports
0 Comments